About Me

My photo
I have recently developed this huge passion for cooking, even though I've been cooking since i was 15 and have been a chef for the last 10 years. I think I am addicted to it. Or am I addicted to eating my cooking? Either way, I want to share my experiences with whom ever is interested. That is why I started this blog. Currently I am self employed as a private/personal chef and a stay at home dad. I am very thankful to have ended my restaurant career not so long ago! It's a hard life, especially when your trying to raise a family! I live in Naples, Florida where I met my beautiful wife while working at a yacht club about 3 years ago. We now have a little 6 month old daughter and life as we know it has changed forever ( for the better)! There is something going on in the food world that is very exciting! People are starting to open their eyes a little. We're going back in time, back to the farm, back to the dinner table. Something that has to be done in my opinion. I spent a lot of time at the dinner table as a child and thought is was very beneficial in how I ended up. The thing I like best about being a chef is that I will never learn it all. Ever!

Saturday, March 27, 2010

How a Dinner is Thrown Together

     Hello all!  Sorry it's been a while since my last post.  I've been busy helping raise a 6 month old baby girl and last week I had three sisters visiting from Asheville, NC.  
     In the past several weeks, my lovely wife Adriane has been making our daughter Macy fresh, organic purees of baby food.  Yesterday we went to Whole Foods and purchased a butternut squash, some ground turkey and a bag of beautiful petite Fuji apples.  Adriane decided to roast the squash by cutting it in halve length wise and removing the seeds.  Then she rubbed the inside liberally with virgin olive oil, seasoned it with kosher salt and very little fresh ground pepper.  On a baking pan she put the squash, cut side down, after she put a bay leaf and a thyme sprig in the cavity where the seeds were.  The squash was roasted at 375 degrees for approximately 45 minutes, depending on the size of the squash.  If you put a little water in the pan while roasting it shouldn't burn.  The flesh should be very soft.
     While the squash was roasting, Adriane sautéed some of the ground turkey with a peeled, seeded and chopped apple until the apple was soft and the turkey cooked through.  In our brand new Kitchen Aid Blender (which we absolutely love) she blended the turkey, apple and roasted squash together until velvety smooth.  Two thumbs up were given by Macy Rose.
     After all was said and done, we had about 1/2 a pound of ground turkey and half a roasted butternut squash left over.  Time to make some yum yums for mommy and daddy.  Mommy made some turkey burgers with just the ground turkey meat and seasoning from a package of ranch dressing (a little MSG goes a long way).  With the left over 1/2 of a roasted squash, I reheated it in the microwave then put the squash in the food processor and added about 2 tablespoons of softened butter, 1 tablespoon of maples syrup, a grind or two of fresh cinnamon, a dash of ground nutmeg, salt and fresh pepper and pureed it until it was velvety smooth.  So we had the turkey burgers and the butternut squash puree ready to go, but we felt we needed something else to go with it.  Digging through one of the produce drawers in the refrigerator, I found a package of mushrooms (shiitake, portobello, cremini).  Perfect!  I'll make a mushroom ragout in the same saute pan I fry the turkey burgers in.  After cleaning the mushrooms thoroughly, I heated a sauté pan over medium high heat for a minute, then I added a splash or two of olive oil and swirled it around.  After it started to shimmer and smoke a little bit I added the turkey burgers, which Adriane pattied out pretty thin so they would cook fast.  After about 2 minutes on the first side, I flipped the burgers and cooked it for another 2 minutes until it was nice and golden brown on both sides.  I took the burgers out of the sauté pan and set them aside in a warm place.  The bottom of the sauté pan had this wonderful brown caramelization in it with a little bit of fat that I had to utilize.  With the pan over medium heat I added the mushrooms, about 2 cups.  The mushrooms were tossed around in the pan until they started to release their water, about 2 minutes.  Then I added 1 tablespoon of chopped garlic to the pan and cooked for 1 minutes.  After the garlic browned a touch I added 1 cup  chicken stock, 1/4 cup of red wine and 3 thyme sprigs and reduced everything down until the mushrooms were just a little saucy.  I took the pan off the heat and added 1 tablespoon of butter and swirled it around in the pan, then seasoned the mushroom ragout with kosher salt and fresh ground pepper and removed the thyme sprigs.
     It's funny because after typing this all out it sounds like it took forever to cook but really this all happened in about 30 minutes, with the squash already being cooked of course.  In the end, Macy Rose gets to enjoy the turkey apple squash puree for several days, and my wife and I got to enjoy a wonderful plate of food with hardly any effort at all.  It was literally "thrown" together!  Check it out:

If you are still reading this post then I've got your attention.  Please comment on your thoughts.  I would love to hear from you!

Cook and Be Well!

Chef Don Paleno


Thursday, March 18, 2010

I Finally Got My Corned Beef


Well, it only took 10 days but I finally made my own corned beef!  My grandmother would be proud.  Actually I only brined my brisket for 7 days because I had to order the salt cure mixture from  Morton's Salt website.  The shipping cost more than the product but I was desperate.  The recipe from Alton Brown called for saltpeter which I could not find.  For the spices, I just used a small container of pickling spices from McCormick.  The end product was very satisfying, although I think next time I will use less of the Morton's TenderQuick and a little less spices.  I used two cups of the TenderQuick with 4 quarts of water. The meat itself could not have turned out more tender especially since I sliced it thin, against the grain.  The brine was a little strong tasting but with a few Guinness Stout pints all was well!  I cannot wait to make a Rueben sandwich out of this wonderful corned beef.  I would highly recommend brining your own brisket next St. Patrick's Day or whenever you feel like it.  Thanks for reading and remember:  Eat Well, Drink Well, Be Well! 

Chef Don Paleno 

Wednesday, March 17, 2010

Spanish Meatballs with Romesco


Last night I did a cooking class for a bunch of Mommas.  Mommas being woman with children.  I've been doing this class/cooking club for the past 6 months and every month has a theme.  This month we decided to do Sangria and Tapas.  Spanish in nature, Tapas are basically appetizer size portions of all types of food.  As for Sangria, it is an alcoholic beverage made from wine, fruit and many other different ingredients.  Here is a basic recipe for Sangria:

·         1 Bottle of red wine (Cabernet Sauvignon, Merlot, Rioja reds, Zinfandel, Shiraz)
·         1 Lemon cut into wedges
·         1 Orange cut into wedges
·         2 Tbsp sugar
·         1 Shot brandy
·         2 Cups ginger ale or club soda
Preparation:
Pour wine in the pitcher and squeeze the juice wedges from the lemon and orange into the wine. Toss in the fruit wedges (leaving out seeds if possible) and add sugar and brandy. Chill overnight. Add ginger ale or club soda just before serving.
If you'd like to serve right away, use chilled red wine and serve over lots of ice.
Addition ideas: sliced strawberries, peaches, handful of fresh blueberries, raspberries, kiwi, a shot or two of gin, brandy or rum, a cup of ginger ale, citrus soda pop or lime juice.
With the Sangria I cooked a Tortilla Espanola (potato omelet) with Sofrito (Spanish tomato sauce), a Orange and Red Onion Salad and Spanish Meatballs with Romesco.  The meatballs were sensational especially with the Romesco sauce.  Romesco is a traditional sauce from the Catalonia region in Spain.  It's very easy to make and can accompany many foods.  The meatballs had a unique flavor probably because of the unique ingredients of pine nuts and cinnamon.  
I would highly recommend having a Sangria and Tapas party at your house.  Invite some friends over, enjoy some wonderful food, drink and good times!  
Here's the recipe for the Meatballs and Romesco.  
  Spanish Meatballs With Romesco Sauce 
1¼ hours | 45 min prep
SERVES 6
For the meatballs
·         1 lb ground pork
·         1 cup fresh breadcrumb
·         eggs, beaten
·         3 tablespoons Italian parsley, chopped
·         garlic cloves, finely chopped
·         1/4 cup pine nuts
·         1/2 teaspoon salt
·         1/2 teaspoon black pepper
·         1/8 teaspoon cinnamon
·         1-2 tablespoon olive oil
For the sauce
·         1 tablespoon olive oil
·         1 slice white bread (large)
·         1/2 cup whole almond, toasted
·         1/4 teaspoon red pepper flakes
·         garlic clove, chopped
·         1/2 cup jarred spanish pimiento, drained
·         1/2 lb tomato, peeled, seeded, and chopped
·         1/4 teaspoon paprika
·         1/4 teaspoon salt
·         1/2 teaspoon black pepper
·         1/4 cup red wine vinegar
·         1/2 cup extra virgin olive oil
  1. For the meatballs:.
  2. In a bowl, combine pork, bread crumbs, eggs, parsley, garlic, pine nuts, salt, pepper and cinnamon. Form into 1-inch balls.
  3. In a large skillet, heat oil over medium heat. Working in batches to avoid crowding, saute the meatballs until well-browned and cooked through, about five minutes. Transfer to paper towels to drain.
  4. For the sauce:.
  5. Heat olive oil in a skillet over medium heat. Fry the slice of bread on both sides until golden (about 1 minute).
  6. In a food processor, finely chop the bread, almonds, pepper flakes and garlic. Add the pimientos, tomatoes, paprika, salt and pepper. Process to a smooth paste. Add the vinegar and process to combine. With the machine running, gradually add the oil in a thin stream to emulsify the sauce.
  7. Transfer meatballs to a serving plate and serve with Romesco sauce.


Friday, March 12, 2010

Ratatouille Revealed


Not only is it fun to say but it's also fun to make and if you haven't seen the movie yet, it's a must see.  The best part about making Ratatouille is that you don't have to be exact.  It's more or less a rustic vegetable stew and you can use it many different ways.  It can be served hot or cold or at room temperature.  It can be served next to an omelet at breakfast or under a piece of fish during lunch.  And if you really wanna jazz up your guests, serve it next to braised beef short ribs with some buttery mashed potatoes and top it off with some cornmeal fried onions.  I always start this stew the same way.  I start by heating a large sauce pot over medium high heat, then I add olive oil and butter, the best of both worlds.  The next thing I add to the pot is sliced garlic and shallots.  I cook them in the butter and oil gently until they both melt and become translucent and very fragrant.  There are a few vegetables that I consider standard and those are eggplant, zucchini, peppers, onions, and  tomatoes, but the last time I made it I added radish, celery and spinach.  I dice all the vegetable so that they are the same size, about a 1/4 inch.  I add them to the pot all at the same time with a little kosher salt, fresh cracked black pepper, and a shot of Tabasco and stir gently with a wooden spoon or rubber spatula.  Then I add some tomato paste.  You can leave this out but I like the depth and richness it adds.  I cook this mixture, uncovered, over medium heat until the vegetables become somewhat al dente, about 45 minutes.  If you like your vegetables less crunchy, by all means continue to cook the vegetables until they are done the way you like them.  You can turn this into a soup or a sauce by adding vegetable stock or chicken stock.  You can also puree it for a velvety texture.  The most important part of making this phenomenal is the addition of fresh herbs.  I like to use fresh thyme, basil, a little bit of rosemary and parsley.  It is important to add these at the very end when you take it off the heat.  If your using dried herbs you can add those in the beginning.  To finish this dish, sprinkle with sea salt and extra virgin olive oil.  If you like spicy foods, add a few splashes of your favorite hot sauce.  Remember, there are no rules in cooking.  Everybody's tastes differ.  If your the type of person that must follow a recipe, go to the library and check out The New Professional Chef's recipe.

To your health,

Chef Don Paleno

Monday, March 8, 2010

Coco Nuts

youngcocotree.jpg (19888 bytes)
Hello All!  It's a beautiful day down here in Naples, Florida.  I've got all the windows and doors open and I can smell the ocean!  Sorry, had to brag.
I cook for a family not far from my house.  A married couple and their 4 children are just too busy to prepare dinner every evening so I do it for them, 3 days a week, at my home and deliver it to them.  All they have to do is reheat it when they get home.  The mother absolutely loves not having to cook or clean or grocery shop!
They let me cook whatever I want, except for a few items.  The kids love it too!  They look forward to the surprise when they get home.  Anyway, on the way back from a delivery one afternoon, I noticed a palm tree on the corner of a street that had a bunch of coconuts underneath it or what I thought was coconuts.  Curiosity got the best of me and I stopped to check them out.  Some of them had been there a while because they were all dried up but a few were still green.  There were also still a bunch of them on the tree.  I picked one of the greener ones up from the ground and smelled it.  It smelled sweet.  I shook it and I heard a liquid sloshing around in the middle so I figured this was a coconut.  Well, I took this little guy home thinking I was going to be cracking it open and enjoying the fruit inside with my dinner that evening.  I ended up forgetting it in the car for my wife to find it the next day crawling with bugs.  Oops!  I brought it in the house anyway and washed it off thoroughly.  I had seen people clean these things on television before and thought I could just use the heel of my chefs knife to peel the outer layer off and there would be a hard coconut in the shell underneath.  Turns out, the heel of my knife went right through the whole thing and a bunch of water gushed out.  Was this even a coconut, in wondered.  Which led me to the world wide web.  You can find a plethora of info on this site as I did: http://www.loc.gov/rr/scitech/mysteries/coconut.html

Here are some interesting facts about coconuts:

  • Every bit of the coconut is used. As a result, coconuts are called the “Tree of Life” and can produce drink, fiber, food, fuel, utensils, musical instruments, and much more.
  • When intra-venous (IV) solution was in short supply, doctors during World War II and Vietnam used coconut water in substitution of IV solutions.
  • Botanically, the coconut palm is not a tree since there is no bark, no branches, or secondary growth. A coconut palm is a woody perennial monocotyledon with the trunk being the stem.
  • Possibly the oldest reference is from Cosmas, a 5th century AD Egyptian traveler. He wrote about the “Indian nut” or “nut of India” after visiting India and Ceylon, Some scholars believe Cosmas was describing a coconut.
  • Soleyman, an Arab merchant, visited China in the 9th century and describes the use of coir fiber and toddy made from coconuts.
  • In 16th century, Sir Francis Drake called coconut “nargils”, which was the common term used until the 1700’s when the word coconut was established.
  • It takes 11 -12 months for the coconut to mature.
  • At one time scientists identified over 60 species of Coco palm.  Today, the coconut is a monotypic with one species, nucifera. However, there are over 80 varieties of coconut palms, which are defined by characteristics such as dwarf and tall.
  • Coconut growing regions are as far north as Hawaii and as far south as Madagascar.
I'd like to add one more fact to this and that would be that coconut milk is a natural laxative.  I found this out the hard way. :)

As for using coconut in cooking, the ultimate treats to me would be coconut shrimp or German chocolate cake frosting.
You can check out http://coconut-shrimp.blogspot.com/ for some really good coconut shrimp recipes.
Click on the picture below for a very good German Chocolate Cake recipe.

Until next time, keep your saute pans hot and your taste buds happy.

Chef Don Paleno


German Chocolate Cake

Thursday, March 4, 2010

What's the difference between Roast Beef and Pea Soup?

The answer to the question in the title is: Anybody can Roast Beef!  HA!  Funny right?  Pretty cheesy joke from way back.  Anyway, I roasted some beef today and wanted to share some info on it.  I bought a 3.5 pound top round roast at the store yesterday and on the price tag was some cooking directions.  It said: in a shallow roasting pan, put the roast, fat side up, into a 325 degree oven until the internal temperature of the meat reaches 145 degrees.  That's it.  That's all it said.  Okay, well I guess to someone who doesn't cook much, that might make sense.  Maybe that's the way the butcher does it?  There was absolutely no way I was going to do it that way!

The biggest thing to remember about roasting a large piece of meat is that you have to create a shell around the outside to hold in the juices.  No juices, no bueno!  How do I create a shell you say?  You have  to sear it, either in a smoking hot pan with a little bit of oil, or in a really hot oven!  The roasting pan I use (pictured above) is actually for a turkey but it works very well here.  Heat the oven to 425-450 degrees.  One thing that will help the roast cook evenly throughout is if you pull it out of the cooler about an hour before you cook it.  Just let it sit out on the counter with a paper towel over the top.
 Next, you want to season the roast liberally with kosher salt and fresh cracked black pepper.  You could also cut some slits in it and stick some garlic cloves in them or add other kinds of seasonings like fresh ground garlic and rosemary or even extra pepper.
 Another thing I highly recommend investing in is a probe thermometer.  This is a thermometer that stays in the meat while it is cooking and there is a wire connected from the thermometer to a hand held display unit.  There are many to choose from and many different price ranges.  I use one made by a company called Maverick.  It talks to me while my food is cooking.  This thermometer is pretty cheap and works really well.

  At this point you need to decide which is the thickest part of the roast and try to get the tip of the probe thermometer right in the middle of it.  I recommend going through the side of the roast rather than straight down through the top.

Now it is time to stick that bad boy in the oven and set your thermometer to your desired doneness.  Then you can go finish watching Oprah or Days of our Lives.  I like to keep the roast in the oven at 425 degrees for about 30-45 minutes to create that sear (shell) we talked about earlier.  Then I turn the oven down to 325-350 and just let it go low and slow.  This 3.75 pounder took about an hour and fifteen minutes to get a medium doneness.  One thing to remember is that the meat is going to keep cooking 10-15 minutes after you take it out of the oven.  So if you want a medium doneness I would pull it out at about 135-140 degrees.
While the meat roasts for the first 30 minutes I cut up some mirepoix to make an au jus!  What the &#$%@* is mirepoix and au jus you say?  Mirepoix is basically a mixture of celery, carrots and onions used to flavor soups, sauces and stews. Here I have 1 carrot, 2 celery ribs and half an onion.
 During the last thirty minutes or so, I will put the mirepoix in the bottom of the roasting pan.  There they will mingle with the juices and caramelize to create more flavor in the au jus.
Au jus basically translates to "natural juices".  As you can see there's not a whole lot of juices so I add chicken stock to boost it up.
Once your timer goes off, the beef needs to take a nap.  In other words, the juices inside are really moving around fast and if you were to cut into it ,right out of the oven, your juices would flow out like Niagara Falls.  You need to let this baby rest for at least 15 minutes.
While the meat is resting you can strain the au jus into a small sauce pan and remove any of the excess fat then season it to taste with salt and pepper.  It should be nice and dark, almost black. In the picture below you can see the fat on top.
Now its time to slice the roast beef, making sure to cut against the grain and that you have a really sharp knife to do it with.  I usually cut it directly in half to find out which way the grain goes.
Another thing that will make this beef sing would be some horseradish sour cream.  I think I will also have some roasted red potatoes, broccoli florets and maybe some carrots with my roast beef.  This is the kind of food I grew up on.  Until next time,

Eat, Drink, and be Happy

Chef Don Paleno

Wednesday, March 3, 2010

What's Eating Macy Rose


Or rather what is Macy Rose eating!  Macy Rose is my 6 month old daughter.  She is starting to eat real "big girl" food.  And for a young chef such as myself, it really puts things into perspective what goes into your child's mouth.  There's not many things more important than a child's nutrition.  How else do they grow up big, strong and smart?  There was no debate between my wife and I about what we were going to be feeding Macy and it certainly wasn't going to be high fructose corn syrup and preservatives which is what most store bought baby food contains.
How hard can it be to make your own baby food?  Actually, it's really easy.  All you need is a good blender or food mill.  The blender we use is okay except for the fact that it is hard to get all the product out of the pitcher, even with a rubber spatula.  I hear that Kitchen Aid makes the best when it comes to functionality but it's not cheap.  The food mill we use is top notch however and very affordable.  We bought the
Oxo Good Grips version and are very satisfied overall.  I would recommend anything by Oxo for your home!
As for what kind of fruit and veggies to feed your baby, you can pretty much try anything depending on their age.  A few good books to reference are : Superfoods for Babies and Children and First Meals & More.  The key to preparing baby food at home is practicing strict sanitary guidelines and purchasing good quality organic ingredients.  After all, a happy baby equals happy parents!  So why wouldn't you do what's best?

Peace, Love & Good Food

Chef Don Paleno

Tuesday, March 2, 2010

Creme Brulee, The Ultimate Treat!

See full size image
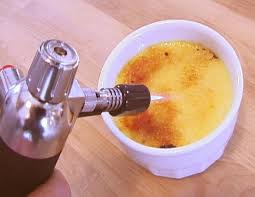
Burnt Cream is Gooood!
Last month, the theme of the mom's club cooking class I have been teaching was French.  French?  Whose idea was that?  Is it possible to cook something French and it be healthy?  Not in this instance!  Creme Brulee only has about four thousand calories.  Okay, maybe not that many.  But it is made simply of heavy cream, sugar and egg yolks.  Well then it can't be that hard, right?  Wrong!  Creme Brulee is something you shouldn't attempt to make if your in a bad mood or if anybody in the house is in a bad mood.  That goes for most baking items!  Who ever said, "patience is a virtue", might have been a pastry chef.

I've made a million creme brulee's in my day and still am able to screw it up good.  To do creme brulee as a demonstration and in 2 hours, you have to prepare several of them the day before.  Oh, and you have to have a propane torch of some kind to burn the sugar on top of the baked custard.  I didn't have one, so I ventured out to Bed, Bath and Beyond.  They had a creme brulee "kit", which included the dishes used to bake the custard in and a small, hand held torch with a small can of propane.  I want to say it was around $19.99, which is a pretty good deal, but there were only 4 dishes and I needed 8, plus the torch wasn't big enough for me.  You know how boys can be about fire and things!  So I opted for the "Professional Creme Brulee Torch", which looked and felt like what I wanted.  When I'm not using it for creme brulee I may need to weld something back together.  You can also blacken veggies with it or even do Baked Alaska. Also, I didn't have any ramekins to bake the custards in, so I swung by Wally World and found some cute, 3 ounce porcelain ramekins for less than a dollar a piece.

There aren't that many different recipes when it comes to a basic creme brulee, until you start adding different flavors.  I decided to use a recipe out of The New Professional Chef, which is written by The Culinary Institute of America.  Fool proof, right?  Wrong again!  I overcooked mine.  Note to self:  Not all Ovens are created Equal!  Just because a recipe says bake it for 45 minutes doesn't mean you shouldn't check it before the 45 minutes.  Catastrophe!  Not really,  they only overcooked (scrambled) a little bit.  I still served them and everybody raved.  Had I been working in a restaurant however, they probably would have made their way to the dishwashers.  The thing the ladies in the class loved the most was burning the sugar on top.  As for the recipe, here it is, but again don't trust your oven.  The custards should wiggle just a little bit when finished and the top should look like glass.  Be sure and chill them overnight!


CIA   Crème Brulee                         Yield: 12: 4oz. portions

Heavy Cream                                   1 ¼ quarts
Vanilla bean, split                           ½ each
Sugar                                                 8 ounces
Egg yolks, beaten                           10 ounces

1.      Combine the heavy cream, vanilla bean, and half the sugar; bring to a boil.
2.     Combine the egg yolks and remaining sugar.
3.     Temper egg-sugar mixture into hot heavy cream; cook until thick enough to coat the back of a spoon; strain through a fine sieve.
4.     Fill ramekins seven-eighths full, place in a water bath.
5.     Bake in a 325F oven until just barely set, approximately 45 minutes; remove from water bath when cool.  Wipe bottom of ramekins and refrigerate overnight.
6.     Sprinkle sugar evenly over top of custard and burn with torch.